Pairing JoyCon Bluetooth Controllers
This chapter will guide you on how to connect Bluetooth peripherals via the command line.
Introduction
Glossary
None
Summary
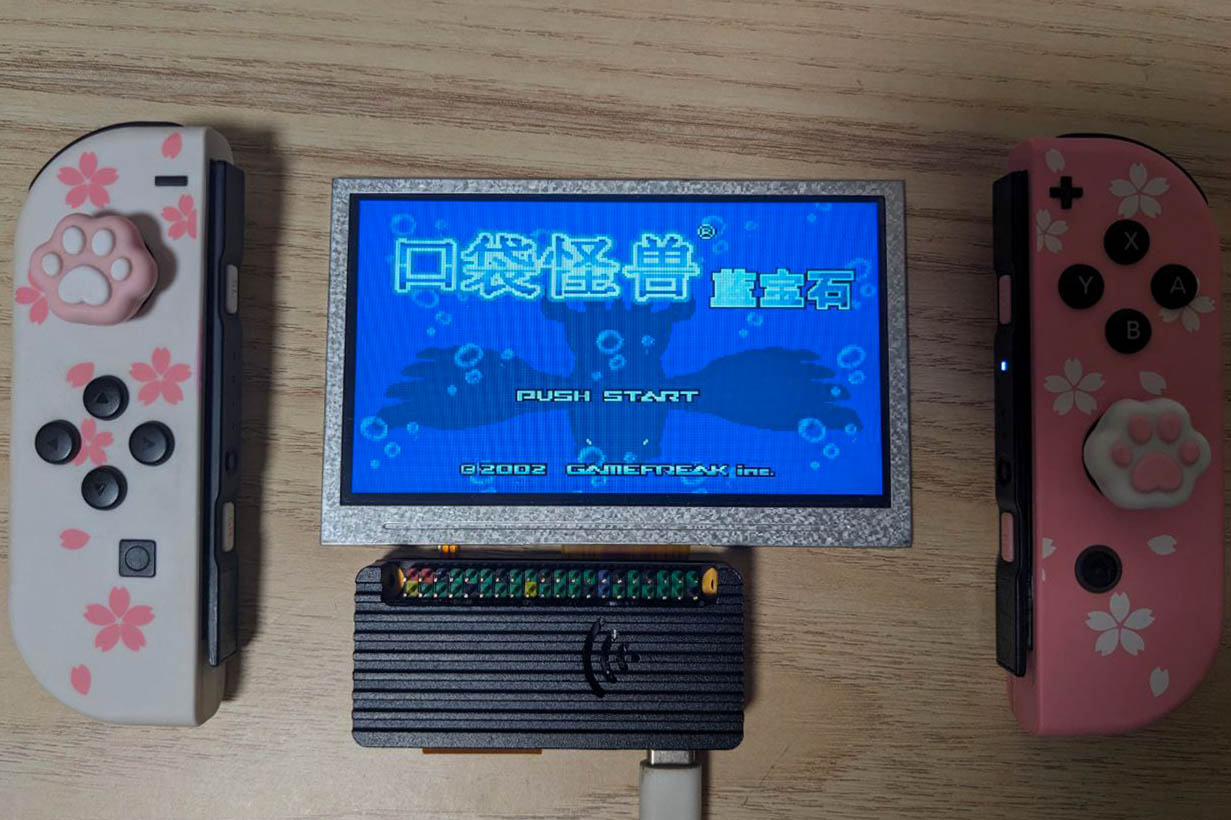
With the onboard AP6255 of the Sakura Pi RK3308B, you can connect Bluetooth peripherals such as mice, keyboards, and even your beloved Nintendo Switch JoyCon controllers to turn it into a mini gaming console!
Pairing with JoyCon
Installing the Bluetooth Package
Install the bluetooth package using the following command:
sudo apt install bluetooth
Using bluetoothctl to Find Devices
Enter the command bluetoothctl to open the terminal, and then type scan on to enable scanning mode.
root@sakurapi-rk3308b:~# bluetoothctl
Agent registered
[CHG] Controller AA:AA:AA:AA:AA:AA Pairable: yes
[bluetooth]# scan on
Discovery started
[NEW] Device FF:FF:FF:FF:FF:FF xxx
[NEW] Device 8C:D0:B2:7C:B4:2F giot.plug.v6shsm
[NEW] Device 78:13:B8:A8:94:E6 78-13-B8-A8-94-E6
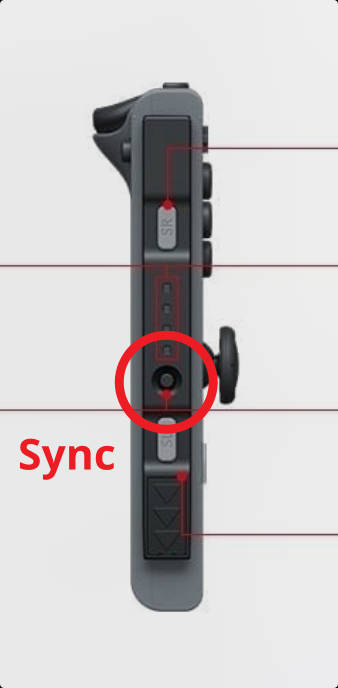
At this point, locate the SYNC button on the JoyCon and hold it until the controller's lights start flashing, then release it.
Observe the terminal, and you should see the following devices appear:
[NEW] Device AA:BB:CC:DD:EE:FF JoyCon (L)
[NEW] Device 11:22:33:44:55:66 JoyCon (R)
Pairing and Connecting
In the example above, we obtained the MAC addresses of the JoyCon from the terminal:
- AA:BB:CC:DD:EE:FF
- 11:22:33:44:55:66
For example, to connect to JoyCon (L), type the command pair AA:BB:CC:DD:EE:FF:
[bluetooth]# pair AA:BB:CC:DD:EE:FF
Attempting to pair with AA:BB:CC:DD:EE:FF
[CHG] Device AA:BB:CC:DD:EE:FF Connected: yes
[CHG] Device AA:BB:CC:DD:EE:FF Bonded: yes
[CHG] Device AA:BB:CC:DD:EE:FF Modalias: usb:v057Ep2006d0001
[CHG] Device AA:BB:CC:DD:EE:FF UUIDs: 00001000-0000-1000-8000-00805f9b34fb
[CHG] Device AA:BB:CC:DD:EE:FF ServicesResolved: yes
[CHG] Device AA:BB:CC:DD:EE:FF Paired: yes
Pairing successful
Wait for the Pairing successful message, then immediately type connect AA:BB:CC:DD:EE:FF:
[Joy-Con (L)]# connect AA:BB:CC:DD:EE:FF
Attempting to connect to AA:BB:CC:DD:EE:FF
Connection successful
When you see the Connection successful message and the JoyCon's player lights start flashing randomly, the connection is successful. Follow the same steps to connect the other controller. Afterward, press and hold the ZL and ZR buttons on both controllers simultaneously and wait for the Linux system to automatically assign a player ID. Once the lights stabilize on Player 1, you can start using the controllers.
Play Some Games
After connecting the controllers, wouldn't you want to play some games? Let's try launching Pokémon!
"Ah Wei, you're gaming again!"
Installing RetroArch
Type the following command to install RetroArch:
sudo apt install retroarch
Then run retroarch to start the game.
Some Performance Optimizations
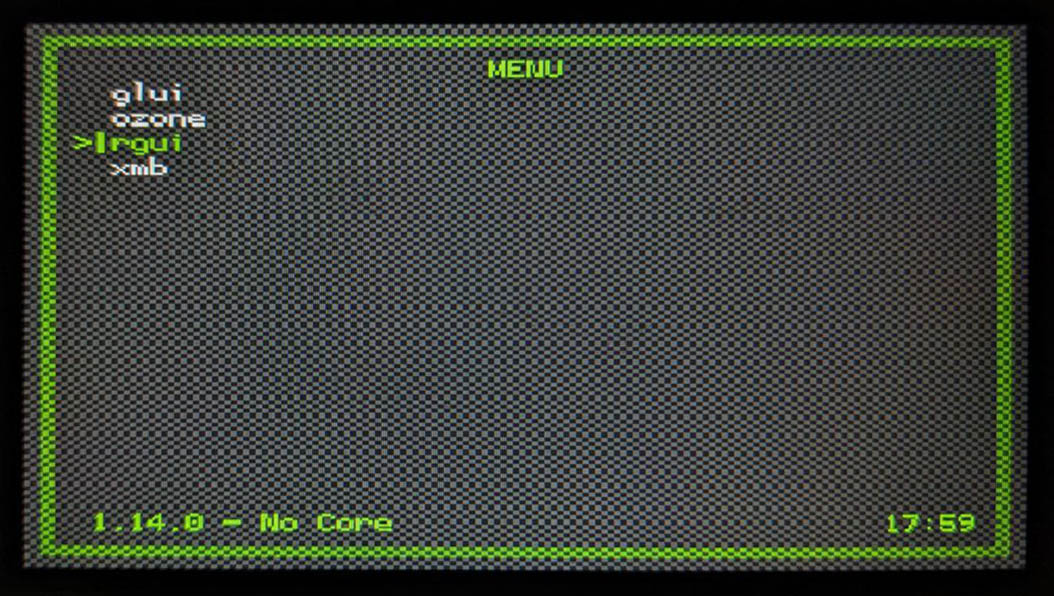
Go to Settings > Drivers > Menu and set it to rgui. Using a simple interface can disable unnecessary effects and improve frame rates.
Go to Settings > Video > Scaling and configure it as shown in the image below.

Using nearest-neighbor sampling can reduce performance overhead.
Loading the mgba Core
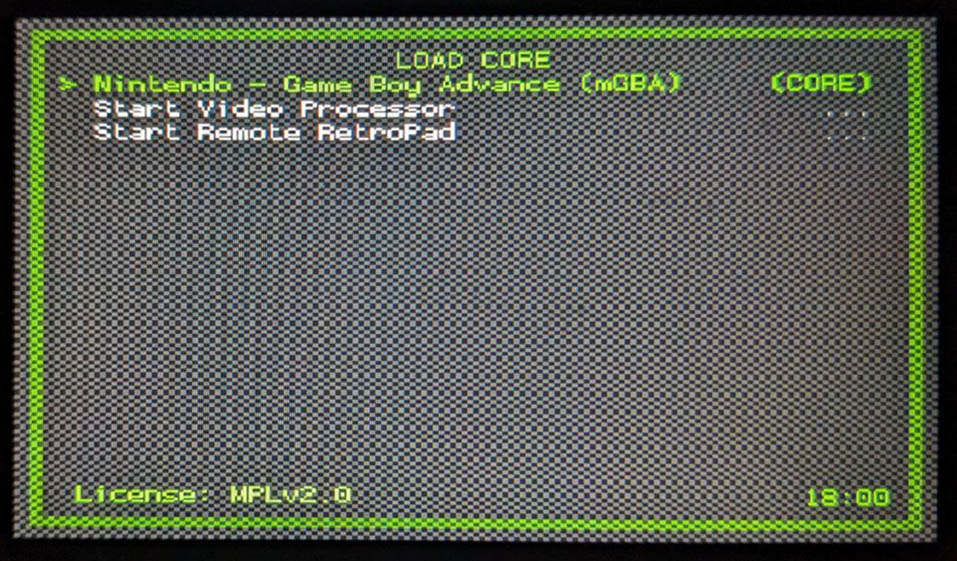
Now you can start gaming!